You have spent the time on design, now it is our turn. Help us give you the BEST quality by preparing your PDF correctly. There are some key factors, BLEEDS, CROPS, CMYK, and RESOLUTION! Click here to download a zipped file of the HIGH RESOLUTION job option to install for the highest quality PDF for print. 
To watch the video on how to install the job option click HERE. Bleeds
WE NEED THEM! A standard bleed is .125” and should be used when an object in your document is meant to go to the edge of the printed page. This helps us cut it down and keep it . Please keep in mind you should not put any text close to the edge of the sheet. No LESS than .125. I normally use .25. Each program handles bleeds a little bit differently. Read below are examples of how to work with bleeds.
If you have any questions on any of the information - please feel free to call Lindsey at (440) 591-5443 or email at lwhitticar@povprint.com
InDesign - Bleeds
When creating a document in InDesign, click “More Options” button in the new file dialog box to display your bleed settings, then enter 0p9 or .125”.
 When your document opens you will see a red box surrounding your page area, this is the bleed. Make sure that the object you want to bleed extends all the way to this red box, not just to the edge of the page.
Illustrator - Bleeds
Illustrator has the same bleed setup as indesign. Refer to the above info when creating your document.
Photoshop - Bleeds
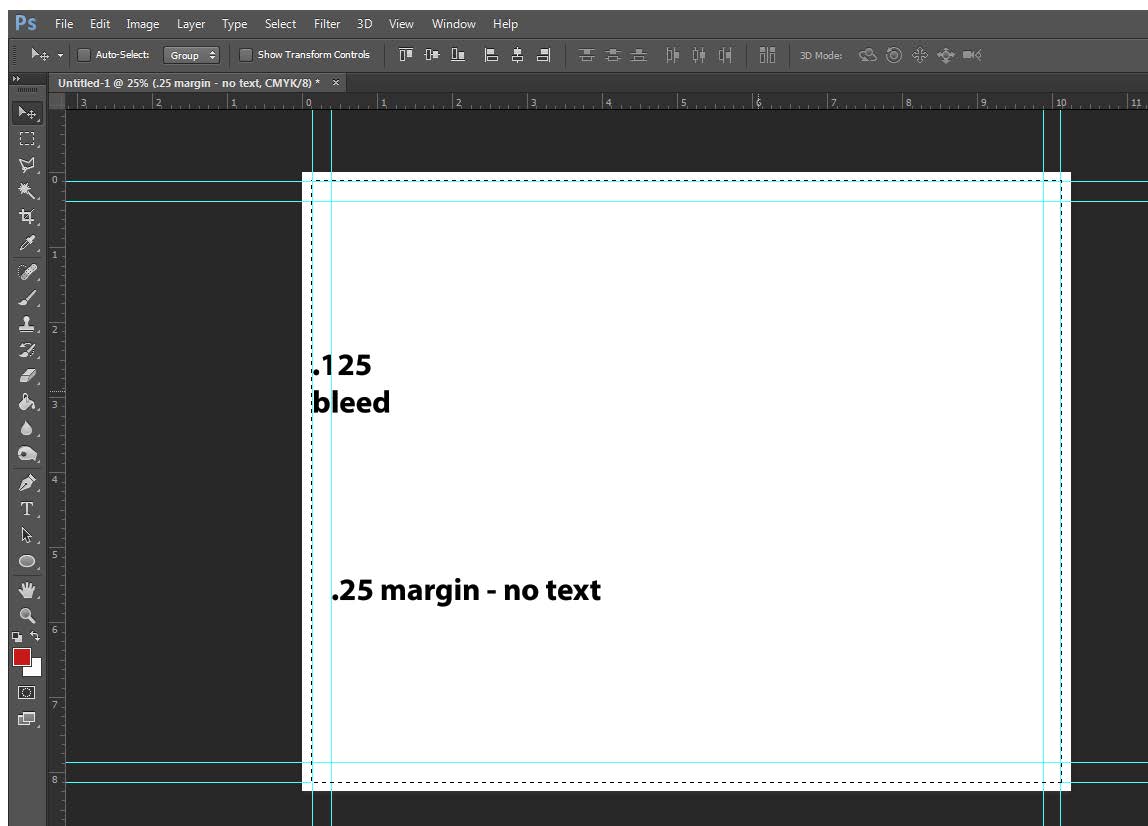
You have to make your own bleed. I wish PS would fix this feature but until they do you are stuck with doing the math and adding an additional .125 on ALL SIDES to your document. When creating a new document, add .25” to the width and height to ensure there will be an extra .125” on all sides. So for example if I have a document that will be a finished size of 8x10. I will create a file that is 8.25 x 10.25. .125 of bleed on all sides and then add in guide lines to help me layout the page.
CMYK color
It is important that your document is created using CMYK in order to produce the most accurate color. Most images use RGB color, which can make them appear slightly brighter than they will actually print. Using Photoshop is the easiest way to change your images from RGB to CMYK very quickly. Open the file and click Image > Mode > CMYK color. This will convert the color values and make the image printer friendly.
Image Resolution
It is important to always use high-resolution images when creating a printed piece. The higher the resolution, the sharper your image will look. Ideal image resolution is 300dpi for images with no text. To see what the resolution of an image is, or to change it, open it in Photoshop. Click Image > Image Size and a dialogue box will appear that tells you how big the image is. If you are doing your layout with text and need clean lines you will need to do 800dpi or more. We print on the press at 2400dpi. So if you are too low your text will look low resolution!
Creating a PDF
Creating a PDF is the easiest way to ensure that your document will get sent to the printer with all its pieces correctly in place. There are certain rules you should follow when exporting a PDF from an Adobe program which are highlighted below.
InDesign
To create a PDF from InDesign, go to File > Export. Name your file accordingly and select your file destination. Be sure to change the format to Adobe PDF, then press Save. A dialogue box will appear.
Change the following options:
• Select Adobe PDF Preset: Press Quality
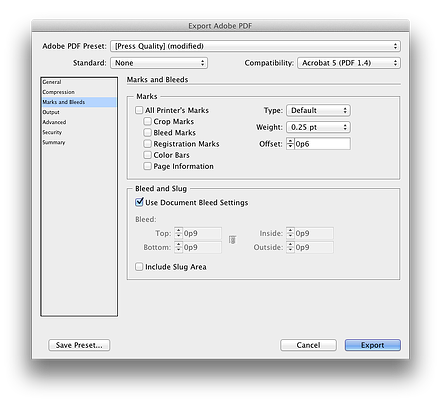
• If your document has a bleed, click on Marks and Bleeds and check off Use Document Bleed Settings.
• Click Export
Illustrator
To create a PDF from Illustrator, go to Go to File > Save As. Name your file accordingly and select your file destination. Be sure to change the format to Adobe PDF, then press Save.
A dialogue box will appear.
Change the following options:
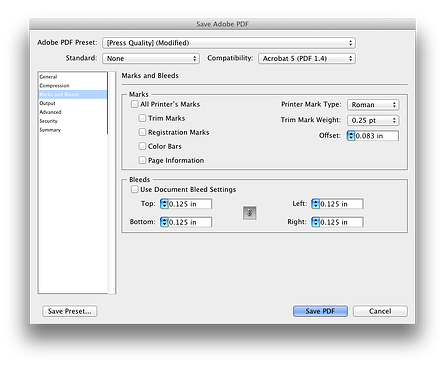
• Select Adobe PDF Preset: Press Quality
• If your document has a bleed, click on Marks and Bleeds and enter a value of .125” on top, bottom, left and right.
• Click Save PDF
 Photoshop
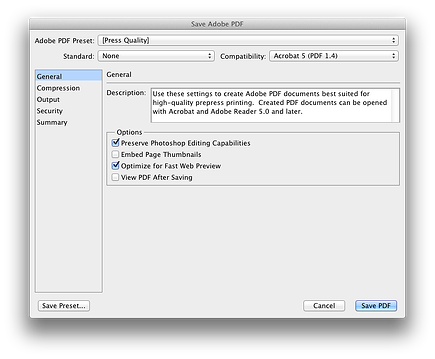
Before you create a PDF from Photoshop, make sure your color mode is CMYK, your resolution is accurate and your layers are flattened.
Once this is done go to File > Save As. Name your file accordingly and select your file destination. Be sure to change the format to Photoshop PDF, then Save.
A dialogue box will appear.
Change the following options:
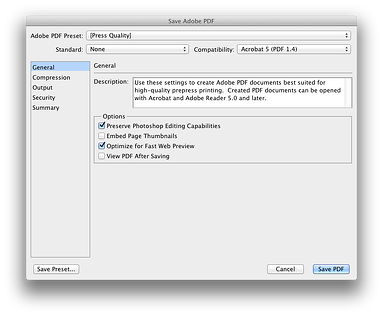
• Select Adobe PDF Preset: Press Quality
• Click Save PDF